Dark Green with Patterned Accent

This one features a very dark (almost black) green on all nails but the ring finger. Remember how that is your accent nail?
On that nail I used a Rimmel Steel gray base coat and then free hand drew the arcs of green. After that dried, I used the tip of the brush to make dots of green between each stripe.
White with Neon Undertips
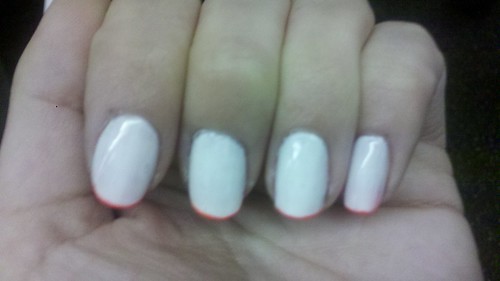
I like this look because the neon can be overwhelming if it's your whole nail, but with just the underneath parts of the tips, it's a fun surprise.
For this look, I started by applying 3 coats of Essie Bone white to each nail.
If I had to do it over again, I'd probably only use 2 coats and let it be a little streaky in order to be more translucent.

View from the underside
Then I painted the under side of each nail with neon orange.
It's important to use a Qtip dipped in nail polish remover and really clean underneath your nails before you paint them.
You probably have some dirt and oil and stuff in there and you want to get it all out so you can make the polish stick well.
Everyone who saw this look in person asked me how I did it so neatly without making a mess on my fingertips.
The answer is that I didn't! I had neon orange all over my fingers. I just took another Qtip dipped in nail polish remover and cleaned it up after I was done. I was careful not to use the Qtip under my nail since I didn't want to accidentally take off the orange.
Starry Sky

These nails belong to my friend Chelsea, who came over and let me mess with her hands.
In this photo the base coat appears grayish but in real life it was more of a sky blue.
Then after three coats of that (it's a cheap UO polish that takes a lot of layers), I went over it with my Essie silver jewel effects flakies.
I am getting better at using the flakies. I still have to really coax them off the brush and position them on the nail, but it seemed easier this time to get the distribution I wanted.
Any nail requests?